Run Your Application Locally
It is possible to load your application via a localhost port or other unique URL. This URL must support an HTTPS connection to load on the web/desktop Discord app (HTTPS is not required for mobile). The downside to this flow is that your application’s network traffic will not pass through Discord’s proxy, which means any requests made by the application will need to use a full URL instead of a “mapped” URL. To run your locally hosted application, follow the instructions for Launching your Application from the Discord Client and set the Application URL Override to the address of your application’s web server.Running Your Application Through A Network Tunnel
Although it is possible to test your application locally, we recommend developing and testing against the Discord proxy. This is helpful to make sure all URLs behave as expected before your application runs in production. One technique to enable testing locally against the proxy is to use a network tunneling tool, such as cloudflared. A typical pattern is for each developer to have their own “development-only” application. To set up a local environment to run through Discord’s proxy, you will need to do the following:- Create a new application in the Discord Developer portal.
- Enable Activities for your app.
- Set up the application’s URL mapping.
- Locally, spin up your web server.
- Install and run a tunnel solution, such as cloudflared. You will point it to your local web server.
Your web server can be HTTP and your network tunnel can upgrade the connection to HTTPS.
3000 with your web server’s port.
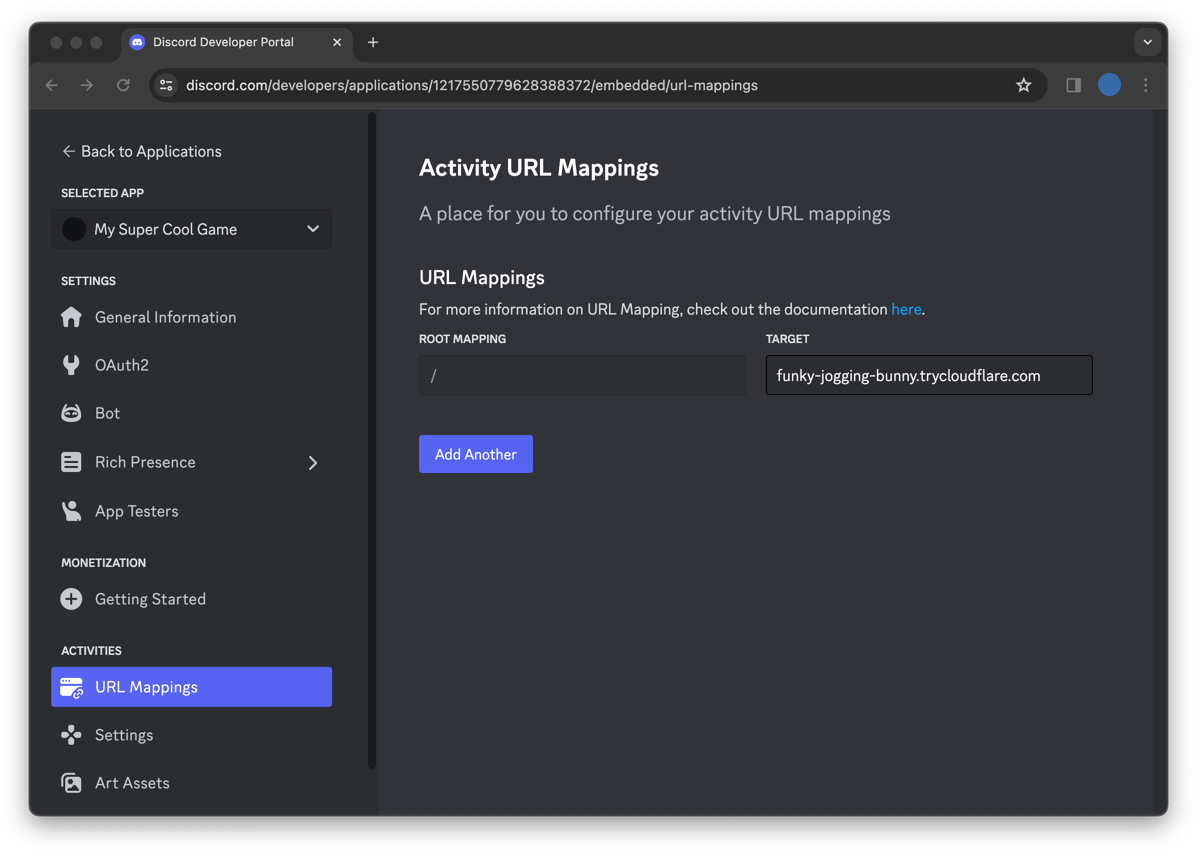
/ url to funky-jogging-bunny.trycloudflare.com to match your network tunnel address and save your changes.
Running Your Application In Production
The flow for setting up your production application is very similar:- If not made yet, create a new application.
- Enable Activities for your app.
- Set up the application’s URL Mapping. The URL for your application’s html should be set to the
/route. - Follow the instructions for Launching your Application from the Discord Client. Application URL Override should not be enabled.
Launch your application from the Discord Client
You will be able to see and launch all activities owned by you or any teams you are a member of via the Developer Activity Shelf. One caveat is that the activity will not be shown on the current platform (web/ios/android) unless you have checked your platform inSettings/Supported Platforms on the developer portal.
To see you app inside of Discord in the Activity Shelf:
Web
- Select ⚙️ User Settings > App Settings > Advanced and toggle on
Developer Mode - Close the settings window and enter a voice channel.
- From either the RTC Panel or the Center Control Tray, click on the “Rocket Button” to open the Activity shelf. You should now see all of the same applications that you have access to in the developer portal. Note: The shelf will only include applications which have been flagged as “Embedded”.
- Click on an activity to launch it!
Mobile
- From your User Profile, select Appearance, and then toggle “On”
Developer Mode - Enter a voice channel
- Click on an activity to launch it!
URL Mapping
Activities in Discord are “sandboxed” via a Discord proxy. This is done to hide the users’ IP addresses, your application’s IP addresses, and to block URLs from known malicious endpoints. As an application owner, you can configure the proxy to allow network requests to external endpoints. Because your application is “sandboxed”, it will be unable to make network requests to external URLs. Let’s say you want requesthttps://some-api.com. To enable reaching this url from inside your application, you will create a new url mapping, with the PREFIX set to
/api and TARGET set to some-api.com. Now you can make requests to /api from inside of your application, which will be forwarded, via Discord’s proxy to some-api.com.
How to set a URL Mapping
To add or modify your application’s URL mappings, click onActivities -> URL Mappings and set the prefix and target values for each mapping as needed.
Prefix/Target formatting rules
- URL mappings can utilize any url protocol, (https, wss, ftp, etc…), which is why the URL target should not include a protocol. For example, for a URL target, do not put
https://your-url.com, instead, omithttps://and useyour-url.com. - Parameter matching can be used to help map external domain urls. For example, if an external url has many subdomains, such as
foo.google.com,bar.google.com, then you could use the following mapping:PREFIX TARGET /google/{subdomain}{subdomain}.google.com - Targets must point to a directory; setting a target to a file (e.g.
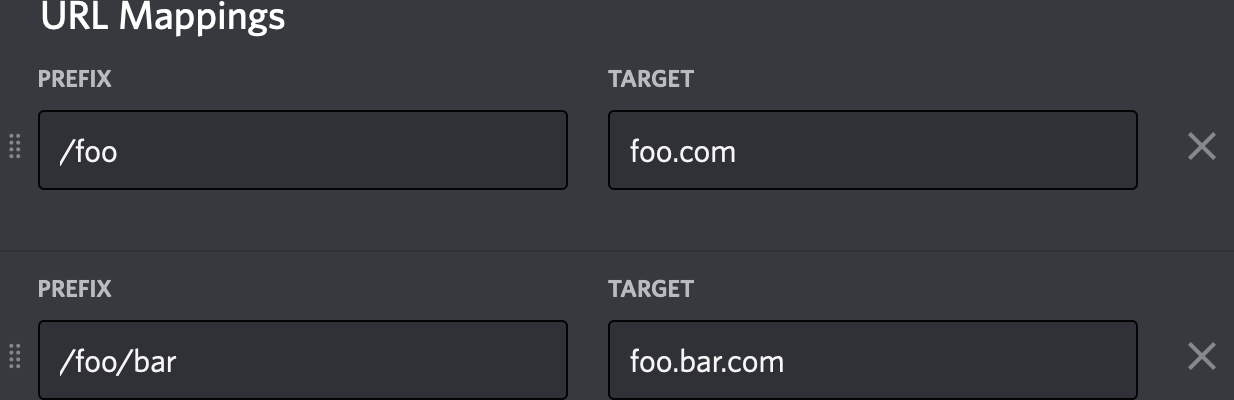
example.com/index.html) is unsupported and may lead to unexpected behavior. - Because of how URL globbing works, if you have multiple prefix urls with the same initial path, you must place the shortest of the prefix paths last in order for each url mapping to be reachable. For example, if you have
/fooand/foo/bar, you must place the url/foo/barbefore/fooor else the mapping for/foo/barwill never be reached.
| ✅ DO | ❌ DON’T |
|---|---|
| Requests mapped correctly | Requests to /foo/bar will incorrectly be sent to foo.com |
 |  |
Exceptions
The aforementioned “sandbox” is enforced by a Content Security Policy (CSP). We have some notable exceptions to our CSP, meaning application clients may make requests to these URLs without hitting the proxy and therefore without establishing mappings. Notable exceptions include:https://discord.com/api/https://canary.discord.com/api/https://ptb.discord.com/api/https://cdn.discordapp.com/attachments/https://cdn.discordapp.com/avatars/https://cdn.discordapp.com/icons/https://media.discordapp.net/attachments/https://media.discordapp.net/avatars/https://media.discordapp.net/icons/
Logging
By default, the SDK will send any consolelog, warn, error, info, and debug events triggered by your app to the Discord application.
Viewing Logs on Desktop
Desktop logs are viewable through the console tab inside a browser’s Developer Tools. See the Troubleshooting Console Log Errors support article for more information. The Public Test Build (PTB) Discord client also allows inspecting your logs from theView -> Developer -> Toggle Developer Tools menu. It can be downloaded at https://discord.com/downloads.
Viewing Logs on Mobile
Mobile logs are viewable via theDebug Logs option inside User Settings on the mobile App. It is only discoverable when you have Developer Mode enabled.
- On the bottom navigation, tap on your avatar and then the gear icon to open your
User Settings. - Tap
Appearance. - Slide the
Developer Modetoggle to ON. - The
Debug Logsoption will be available under theDEV ONLYsection.
Filtering for Application Logs
Inside the Debug Logs view, you can search for your own application logs with the possible keywords:RpcApplicationLogger- Your Application ID
[RpcApplicationLogger] <application-id> - message
The first section of Debug Logs are not your application logs but Discord specific app startup info which is not relevant to your application.
When you scroll down the page, your application logs should be visible.
Sharing Application Logs from Mobile
WithDeveloper Mode enabled, you can share your application logs from within a Voice Channel.
- In the voice channel, swipe from the bottom to see the expanded voice controls. Tap on
Share Application Logs. - You’ll be presented with a native share sheet where you can save the logs to a file or share it as a message.
Disabling Logging
If you do not want logs to be forwarded to the browser, you can disable it with the optional configuration object.Forwarding Log Messages
You can forward specific log messages via the SDK commandcaptureLog as shown below.