role_connections.write scope.
This tutorial walks through building a Discord app in JavaScript with linked roles support.
All of the sample code used in this tutorial can be found in the
linked-roles-sample GitHub repoCreating an app
The first thing we’ll do is create an app through the developer dashboard. If you already have an app created, you can jump right to the Running your app section.Basic steps to create an app are outlined below, but a more detailed walkthrough is in the Getting Started guide.
- Navigate to the developer dashboard
- Click New Application in the upper right corner, then select a name and create your app
- Click on the Bot tab on the left sidebar. On that page, click Reset Token and store the token somewhere safe (like in a password manager)
Adding scopes
Apps need approval from installing users to perform actions inside of Discord. So before installing your app, let’s add some scopes to request during installation.- Click on
OAuth2in the left sidebar, thenURL generator - Check the
botscope - After the scope is selected, you should see a Generated URL which can be used to install your app
See a list of all OAuth2 scopes, or read more on user permissions in the documentation.
Installing your app
Copy the Generated URL from above, and paste it into your browser. You’ll be guided through the installation flow, where you should make sure you’re installing the app on a server where you can develop and test. After installing your app, you can head over to your server and see that it has joined ✨Running your app
All of the code used in the example app can be found in the GitHub repository.Remix the project
This guide uses Glitch, which allows you to quickly clone and develop an app from within your browser. There are also instructions on developing locally using ngrok in the README if you’d prefer.While Glitch is great for development and testing, it has technical limitations so other hosting providers should be considered for production apps.
Project structure
All of the files for the project are on the left-hand side. Here’s a quick glimpse at the structure:Configure your app
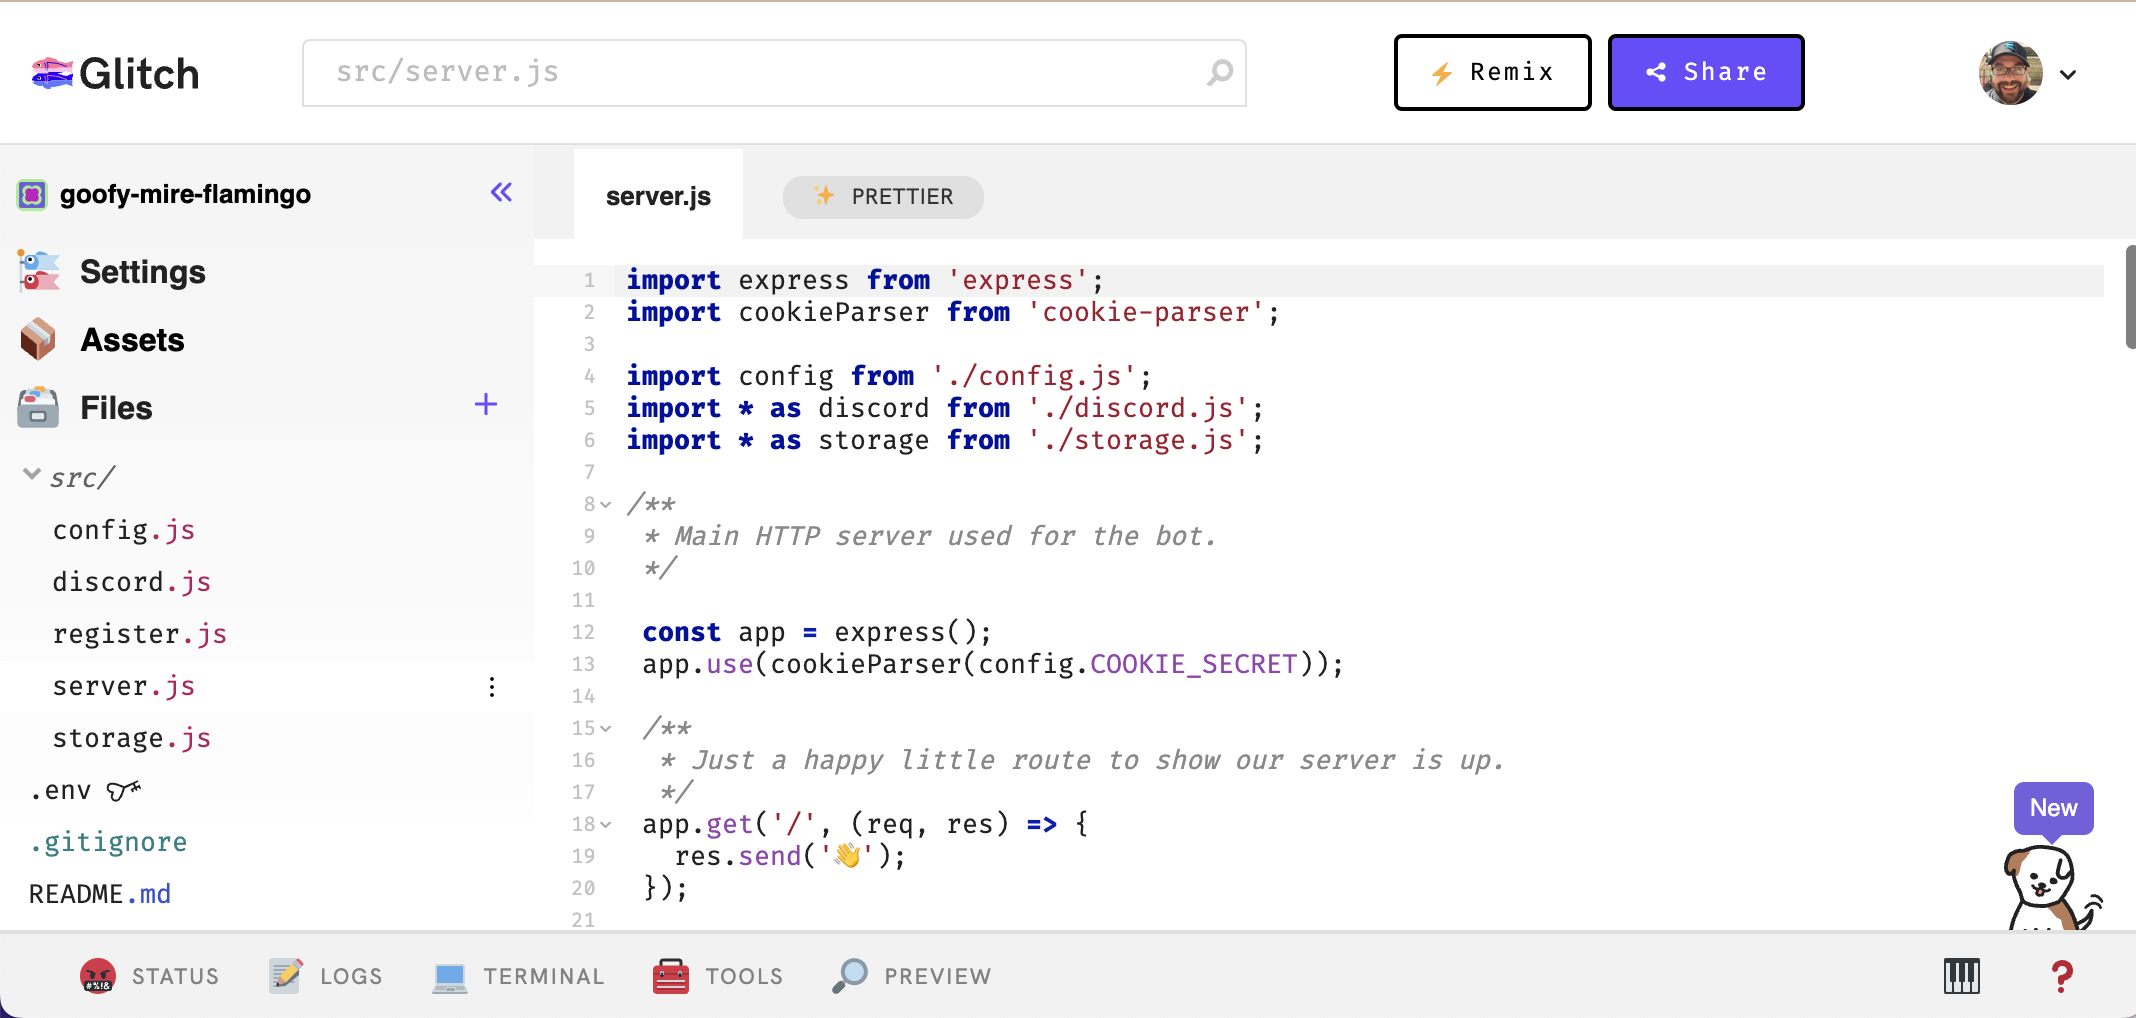
There’s already some code in yourserver.js file, but you’ll need your app’s token and ID to make requests. All of your credentials can be stored directly in the .env file.
First, copy your bot user’s token from earlier and paste it in the DISCORD_TOKEN variable in your .env file.
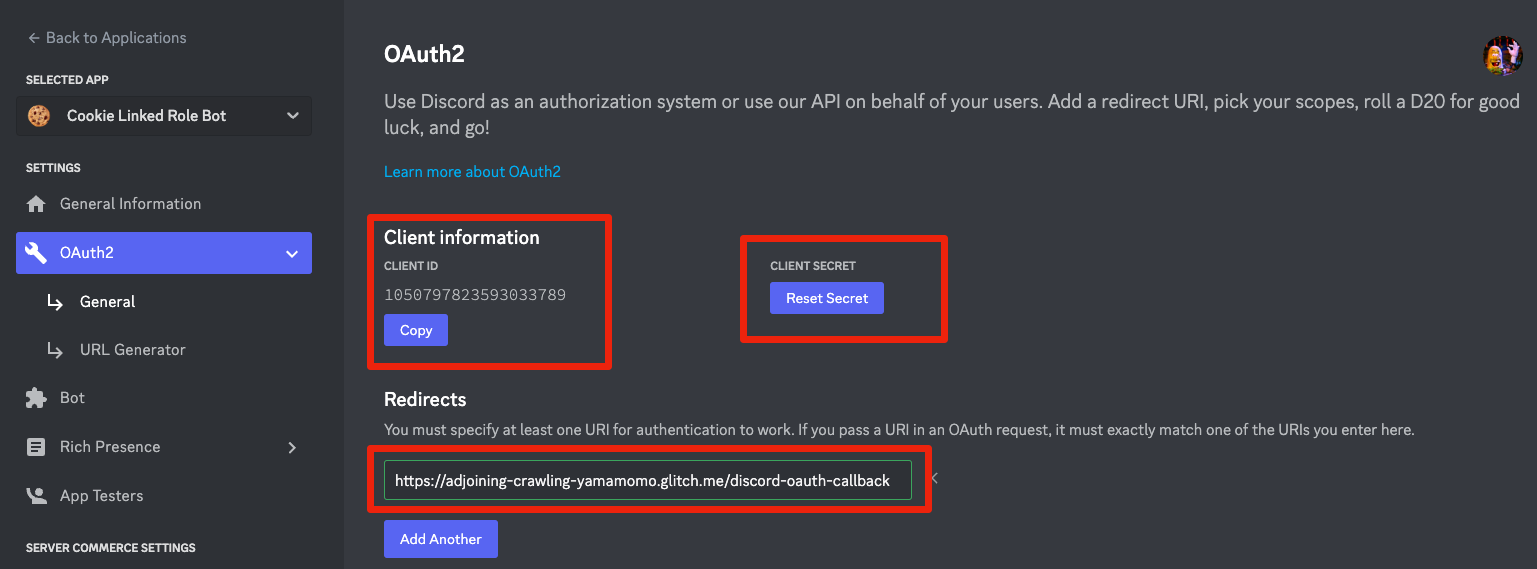
Next, navigate to your app settings in the developer portal, and navigate to OAuth2 -> General. Copy the Client ID and Client Secret for your application, and paste the values as DISCORD_CLIENT_ID and DISCORD_CLIENT_SECRET in your .env.
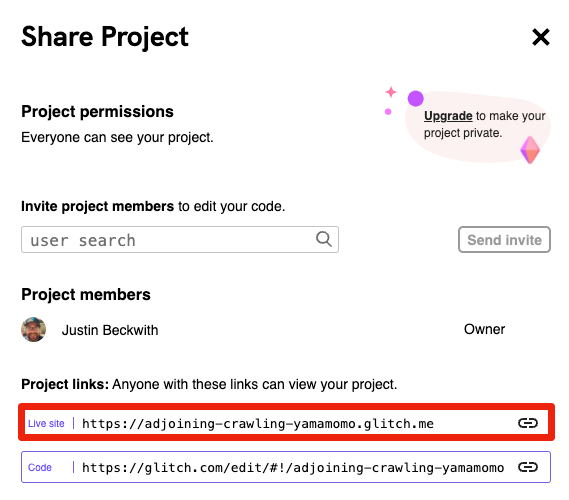
Share button for your project. Copy the public live URL for your app:
/discord-oauth-callback route. Copy this URL, then paste it as DISCORD_REDIRECT_URI in your .env.
Go to the General Information tab in the developer portal, and scroll down to the Linked Roles Verification Url field. Paste the base URL to your Glitch app, add the /linked-role route, then save.
For the Glitch project used in the screenshots, the verification URL would be
https://adjoining-crawling-yamamomo.glitch.me/linked-role
Terminal tab. Run the following commands:
.env as COOKIE_SECRET. Your .env should look something like this:
Registering your metadata schema
As a one-time step, you must tell Discord which metadata fields you are going to allow admins to use for linked roles associated with your app. To configure connection metadata for your app, you’ll call the PUT /users/@me/applications/<application_id>/role-connection method with application connection role metadata. In the sample app, this is handled insrc/register.js, and can be run via the command line.
Go back to Glitch, click the terminal tab, and run the following command:

Trying it out
Now that you’ve built your app, let’s give it a try both from the server owner and the user’s perspective.Creating the linked role
To try out the app, we’ll create a linked role in a server where you have admin permissions. Open up the Server Settings, select Roles, and click onCreate Role.
Give the role a name, save it, then click on Links. Click the Add requirement button, and you should see your bot in the list of available Apps. Click on it, and you will see a setup screen where you can configure specific criteria for your role.

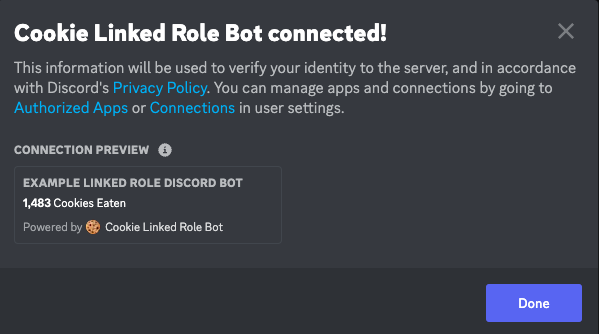
Acquiring the role
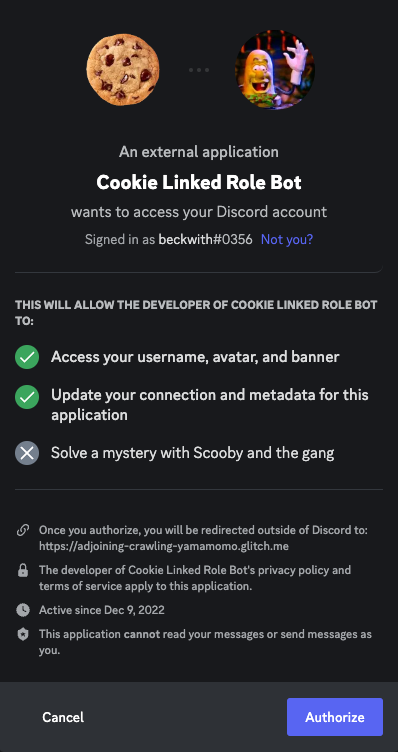
To acquire your newly created role, click the server name in the upper left corner of the screen, and selectLinked Roles. Click on your role, and it will present the opportunity to connect your account.
When you connect your account, one of the scopes requested in the OAuth flow is
role_connections.write, which is required for an app to update a user’s role connection information.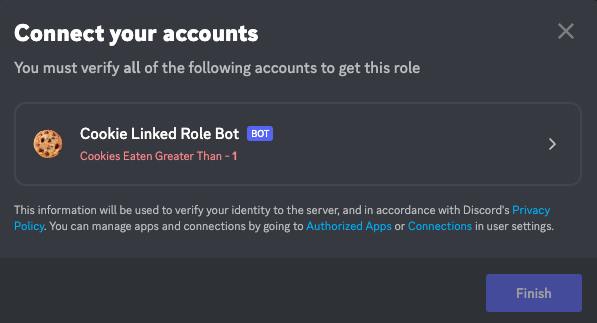
Authorize, and then return to Discord.
Tips & Tricks
Token storage
This app largely relies on Discord’s OAuth2 implementation to obtain access tokens. This model of user based authentication relies on storing refresh tokens, and using them to acquire access tokens. The example code insrc/storage.js uses in-memory storage to manage these tokens, but for any production deployment a database with persistent storage should be used.